Car seat covers are useful for quite a few reasons. Not only will they protect the original upholstery of the vehicle, but they also add a special personal touch to the interior. Sure, you can go out there, and buy one that is pre-made for your car, but it can also be a fun DIY project to make a set yourself, completely from scratch.
Below, you'll find a car seat cover tutorial on how to make it happen, and if you're a little crafty, you might find it a lot easier than you may have thought it was. All you need is a little time, patience, and a few materials.
DIY Car Seat Cover Materials
Here's what you'll need to make your own car seat cover. These are materials you can find on Etsy, at Walmart, or any store that sells arts and crafts supplies.
- Fabric
- Marker
- Elastic
- Clear plastic sheets, newspaper, or blank sewing pattern paper.
- Scissors or fabric cutters
- String or twine
- Sewing machine or heavy needle and thread
DIY Car Seat Cover Construction
Let's go over the step-by-step instructions of making car seat cover from scratch:
1. The first step in the process is to make the pattern for the new car seat protector. Take your clear plastic sheet, or blank sewing pattern, and lay it over the actual sitting portion of the seat. Make sure that there is extra material draped over the bottom edge, left, and right sides. From there, you can spread the paper flat, and use your marker to draw lines over the existing seams in the upholstery. You can follow this process to make lines for the back rest portion, as well.
2. Use your scissors or fabric cutters to cut along the lines that you just drew, and you can get rid of all the excess paper. Just like that, you now have a pattern template in order to make your custom car seat covers.
3. Now that you have your template, you can lay that on top of your custom fabric of choice for the actual seat cover. It's best to use a fabric that can also provide a little air flow, so it doesn't get too hot to sit on. Using your marker again, trace out your car seat cover pattern onto the fabric, leaving at least half an inch of space outside the original template lines. This way, you'll have more than enough fabric to sew the parts together. After you've marked it out, use the scissors to cut your fabric along the lines.
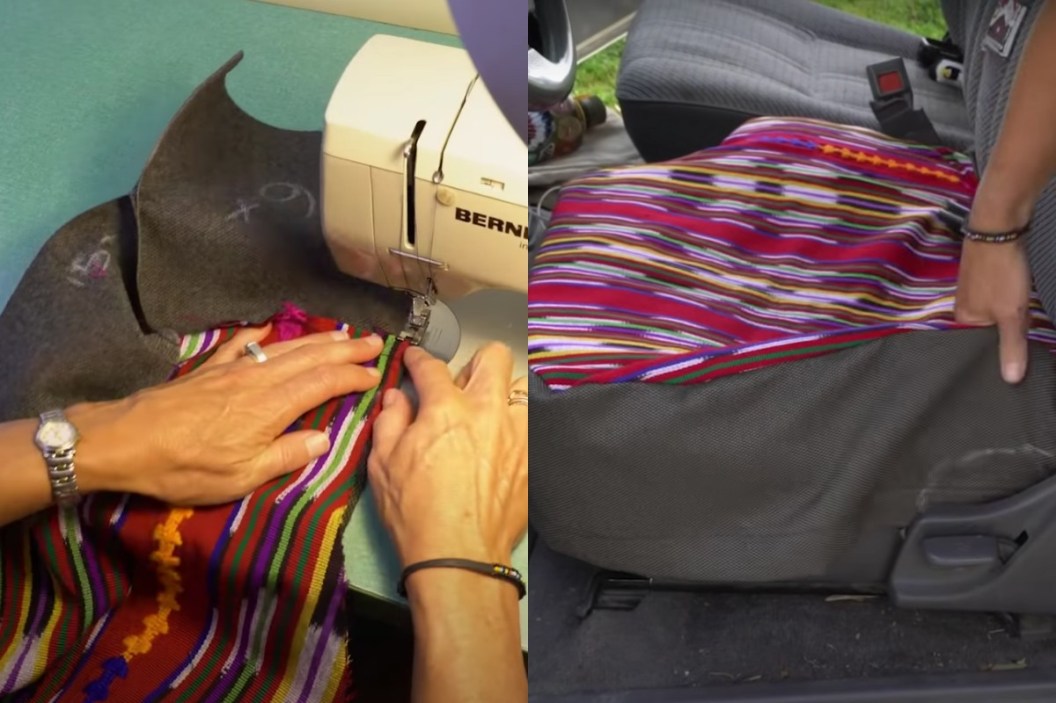
4. Use your sewing machine or needle, and begin to sew the edges together using the extra seam allowance. You'll want to make sure the bottom, side, and top stitches are tight enough, so that they will last longer. Finishing up the ends of the stitching with a zig zag stitch is a good way to ensure they stay tight.
5. Now you can break out the elastic. Measure the seat to determine just how much you'll need to secure the bottom hem and the backrest in place. To do this, you'll want to sew each end of the elastic in place, then sew the middle portion while keeping it partially stretched. Repeat this process, and add the elastic to the sides of the backrest.
6. Finally, you'll want to sew the backrest and the seat portions of the seat cover together. Following this, you'll also want to sew in two lengths of string or velcro midway up the backrest portion, one for each side. The length of string should be approximately the width of the backrest, or just a little bit longer. That will complete the construction of your new seat cover. Ironing the cover will smooth things out a bit if the fabric is wrinkled.
7. Now that the sewing project is completed, you can fit it onto the actual seat itself. Stretch the elastic portions of the cover to fit over the sides and backrest of the seat. All that's left is to tie up the string portion in the back to ensure it stays snug on the seat.
Just like that, you now have your own custom-made seat cover. Once it's all said and done, it's an extremely satisfying project to work on, and what really makes it cool is that you can personalize the different fabric pieces and pattern pieces to anything that you like.
You can use this same process to also include a cover for the headrest. If you find that this written tutorial is too hard to understand, there's also a handful of other pics and video tutorials out there that can hopefully make the process a little easier. Once you gather all your materials that you'll need, you can knock this project out in less than a weekend, and it's well worth the time that it takes to have your own unique set of covers.

Products featured on Alt_driver are independently selected by our editors. However, when you buy something through our links, we may earn a commission.
This post was originally published on November 30, 2020.