Debadging your car is one of the simplest and cheapest ways to give your vehicle a cleaner look. It's a perfect DIY project to do in your spare time, and the effort is well worth it once you look at the final results. If you're trying to make your car stand out from the crowd a bit more, this is certainly one way to do it.
The best part about this project is that it can be done with some pretty common household items. If you've never thought about removing your car badges or you're just unsure of how to do so, let's go over exactly how to debadge a car.
How to Debadge Your Car
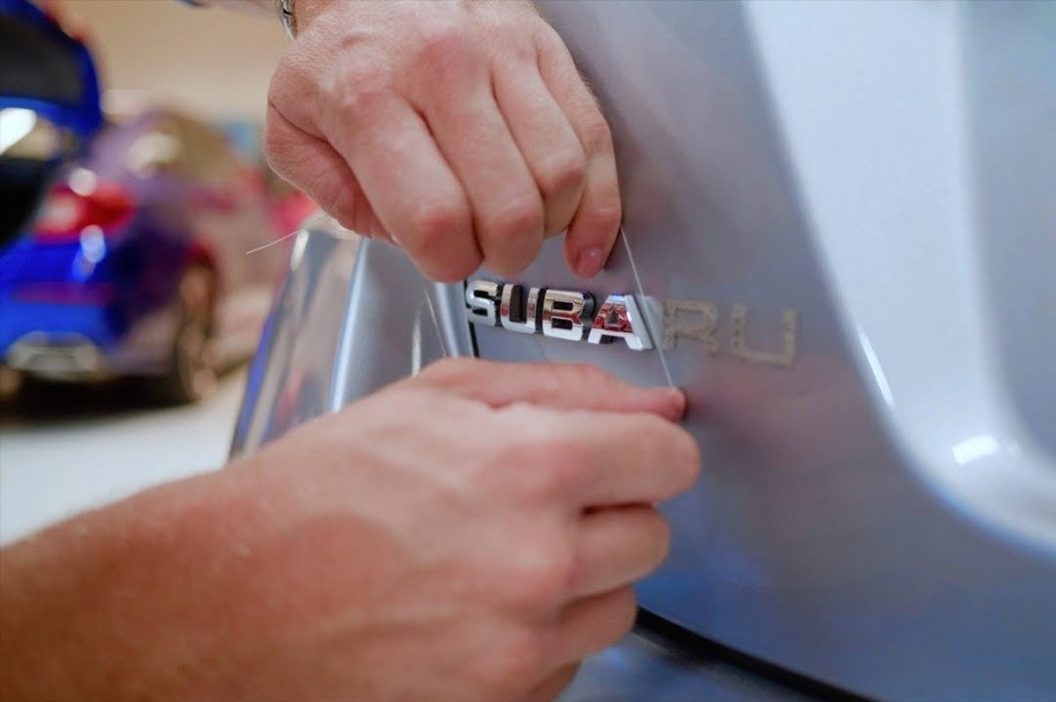
Photo by Wolfgang Kumm/picture alliance via Getty Images
Inspect
Now, the first step in the debadging process is actually finding out how your car emblems are attached to the vehicle. Some models will have badges that attach with just adhesive, and these are the ideal types that you want, because the process is simple. Others will come with badges that have additional support from rivets or screws. While you can remove these, most of the time it means there will be a hole in the body panel after removal. This may require additional bodywork and a touch-up on the car's paint to give it a smooth finish.
You can likely find how the badge on your particular car is attached by checking out the repair manual. If that fails, then it's a good thing Google exists. Finding the answer to that question shouldn't take too long. Once you figure that out, you can move forward with the removal process.
Prep
In order to remove the badges, you need to loosen up the strong adhesive behind it. To do that, you're going to need some heat. This is one of the few times that leaving your car out in the sun prior could be beneficial.
There's plenty of ways to heat up the adhesive. You could use a heat gun, a hair dryer, or even fill up your thermos with hot water and run it down from the top. Don't boil it, though, because that can damage the paint on your car. Additionally, you can use an adhesive remover like Goo Gone for added assistance in loosening the glue. You'll need it anyway during cleanup, so it doesn't hurt to throw a little on before you start to take the badges off. Once you get the adhesive hot, you can begin the actual removal process.
Removal
Again, there are a few different ways you can go about this step. Since I'm very particular about paint, I always try to recommend that people use some dental floss or fishing line for this. If you've been flossing like your dentist said, you should have some laying around. Using that, or some the thin fishing wire, you can start to actually saw through the adhesive and you just work from one end to the other. This is definitely the best way to do it if you want to take no chances of messing up the paint.
Another option would be to use a plastic wedge, plastic razor blade, or some other thin plastic scraper. By carefully working the edges of the badge, you'll start to see it begin to lift from the body. Be careful prying the badge too hard, because it can break. Working the edges from multiple different angles will help you get it off in one piece.
Some people have even used credit cards to cut through the adhesive. The most important thing is that you're not using anything metal. Using metal is guaranteed to scrape and scratch the paint, which defeats the purpose of even going with the clean debadged look in the first place.
Just keep working at the adhesive and soon the badge will come right off.
Cleanup
Once you debadge the car, there's probably going to be some leftover adhesive residue still on the body panel. Break out the adhesive remover once more, and apply it to any areas that need it. Use some soapy water and wash the area that you just removed the badge from. After everything is dried up, apply a coat of car wax in a circular motion, and you can get everything buffed with a nice microfiber towel or microfiber cloth. After waxing, you should be left with a flawless and smooth body panel that looks even better than it did at the dealership.
Obviously, if you have screws and rivets holding your badges on, it does add steps that include repainting. However, you can still use this guide to help you remove the adhesive portion. Overall, it's pretty simple to do at home, so you can avoid paying a body shop to do it.
A Look at the Debadging Process
Now, if you read all the above instructions and still have no idea how to debadge a car, not to worry. Some of us are just visual learners.
Thankfully, the above video from Automotive Technology By Sinclair College should give you a better idea of what it actually looks like to debadge a car. It's only a little over five minutes, so be sure to watch the full video so you're not missing anything.
Oh, and please, please, please remember this: watch this paint!
Products featured on Alt_driver are independently selected by our editors. However, when you buy something through our links, we may earn a commission.
This post was originally published on August 21, 2020.