Learn how to pump up the volume in your pony.
Whether you own a sweet '64 Fairlane, a 2010 Mustang or '80s Pinto, good tunes are a must (especially if you are stuck in a Pinto) for quality cruising. Problem is, with all the misinformation on the Internet and local specialty shops disappearing from Main Street, getting the facts on what works and what is junk has become increasingly difficult. To help you separate the wheat from the chaff, we have put together a buyer's guide for all things electronics for Mustangs and Fords. We have compiled a basic fitment guide for speakers, detailed a few products and have a few tips and tricks as well.
Head Units
First things first, this is the beginning of your sound system and is a critical component. Unless you have a new (2005-up) Mustang with one of the premium systems, this should be the first thing you replace, even before the speakers. Increasing the quality of the head unit (also known as the radio or stereo) will make your stock speakers sound better, and new speakers sound even better than that. There are a few caveats to this category though, so be careful not to get sucked into the vortex of marketing. All head units, regardless of brand, are only capable of providing up to about 20 watts per channel, max. The power supply for a head unit is not big enough to accommodate any more than that. Head units use IC (Integrated Circuit) chips to power the speakers. A stock head unit amplifier is capable of 5-7 watts, at 5 watts, the amp will distort before the speaker reaches its maximum potential. This tends to make the listener turn it up, maxing out the amp, distorting the speakers, which will eventually cause the speakers to blow. It is always better to slightly over-power (in terms of power ratings) a speaker than it is to under-power one.
Stock head units have come a long way in terms of fidelity. The quality is better, they use outboard amplifiers for more power and they have more features. There are different schools of thought on keeping the stock head unit. This author prefers aftermarket units, but likes some high-end units. Ford SYNC units and the high-end videonavigation pieces are great, and offer a lot of added features, but they still lack in the fidelity department. For these vehicles, there are solutions like the JL Audio Clean Sweep and Rockford Fosgate 3Sixty. These devices integrate the factory head unit controls with aftermarket amplifiers and speakers, removing the factory equalization (which is substandard by any means), allowing the user to program their own equalization, and with the Rockford 3Sixty, control just about every aspect of the audio signal, even adjust time alignment (for serious audiophiles). Some newer cars have other functions built into the head unit, making replacement impossible, so using devices like the Clean Sweep and 3Sixty are required.
When looking into purchasing a new head unit, you need to consider the overall goal. If you simply want better sound with a CD player, then you can find that for around $200. If you want to add subwoofers and amplifiers, the head unit must have pre-outs. Also known as RCAs, these stereo-pair (left and right) outputs bypass the internal amplifier, supplying the direct pre-amp signal to the amplifiers. All of the main controls-volume, balance, fade and EQ settings are provided, without the high-level amplified signal. Sticking with a brand that is known for quality is a good idea, but be wary of a head unit that offers too much for the price, that just means that the manufacturer is skimping on quality for quantity and that just does not sound good.
Older cars, anything built prior to 1990 (everything older than 1984, though there are exceptions) could have a shaft-mount radio. If your head unit has two knobs, one on either side of the radio, then you have a shaft-mount radio. These radios require cutting the dash in order to fit an aftermarket head unit in the dash. There are three main sizes for head units- DIN, DIN-and-a-half (DIN.5), and double-DIN. Whether the radio is shaft-mount, uses a mounting sleeve or the ISO-DIN bolt-in configuration, the basic dimensions are the same. DIN-2"x7"; DIN.5-3"x7"; Double-DIN-4"x7".
Most non-shaft-mount Ford radios use a special locking mechanism to keep the radio in the dash. Removal requires a set of "Ford Keys" which are steel loops with small catches on the ends that unlock and allow the radio to slide out of the dash. Both DIN and Double-Din Ford radios use this design. While a Double-DIN head unit requires a dash kit for installation of an aftermarket head unit, a single DIN dash only requires the metal sleeve (which comes with all DIN-size radios) be installed in most vehicles. If you are unsure of what you have, check Crutchfield.com for your specific vehicle requirements.
1965-1979
Mustangs built prior to 1979 use shaft-mount radios. These dashes must either be cut to install a DIN-sized radio or use a shaft-mount stereo with a CD changer.
1979-1993
The Fox-body saw the change from shaft-mount to the sleeve-mount DIN radio. Early models use a double-DIN shaft-mount radio, which requires a kit to install a single DIN-sized head unit. Usually these kits provide a small pocket for storage above or below the radio. In 1987, Ford adopted the "Ford Key" retainer design. These radios require a specialized set of keys to remove (available anywhere stereos are sold) and installing a new radio requires a dash kit to install an aftermarket stereo. You can install a single or double-DIN head unit. Some cars came with the Premium sound system, which has built-in amplifiers. In order to install aftermarket components (head unit or speakers) you need to either bypass or integrate the factory amplifier. There are wiring kits with the appropriate plugs to make this a simple plug and play operation.
1994-2004
In 1994, the Mustang went to a single DIN head unit in the dash. The Ford Key retainer remains, but the only thing required to physically mount the head unit is the metal sleeve that comes with every new radio. Wiring is simple, requiring a plug kit harness that you wire to the new head unit's wire harness. Amplified Premium systems require either integration (for retaining the factory speakers) or bypassing, to use aftermarket speakers with the factory wiring, so you don't have to run new wires throughout the car.
2005-up
The new Mustang body style uses a different mounting. There is a dash bezel that surrounds the radio. This bezel covers the four screws that hold the radio in place. In most cases, you can install a double-DIN head unit without a kit, but a single-DIN unit requires a plastic dash kit to take up the extra space. The wiring kits still apply. In many new Mustangs, the head unit provides navigation and other extras that you might not want to lose. In this case, you want to look into the OEM integration devices like the Clean Sweep from JL Audio and the 3Sixty from Rockford Fosgate.
Once the mounting considerations are taken care of, the wiring must be hashed out. For newer Mustangs, starting with the 1979 Fox-body, wiring kits are available to make the basic power and speaker connections simple. Older cars require more work, hand-wiring each connection. While not exceedingly difficult, if you do not feel comfortable with wiring, you need to seek professional assistance. Whatever you do, don't cut the factory plugs off. You will just cause more trouble for yourself.
Speakers
The visceral experience of a car audio system comes from the speakers. Mids, highs and lows are all part of the dynamics for the audio system, and it is incredibly difficult to achieve proper balance without all three components. You need tweeters, mid-range drivers (woofer) and subwoofers. We will get to the subs later on, this section will focus on the mids and highs. There are several types of speakers, each with their own characteristics of sound. Starting at the low end-Single cone, Coaxial (includes tri and quad), and Components.
Single cone - These are the most basic sound producing speakers. They are commonly made with the lowest quality materials and often feature a "whizzer cone." A whizzer cone is basically a ghetto tweeter made of paper to produce the higher frequencies. This is what most factory audio systems use for the standard components, particularly in the older cars. They can be any size, from 3.5" on up to 6x9".
Coaxial - This type of speaker gets its name from the number of actual transducers included in the assembly. A single woofer serves as the main platform and up to three tweeters are attached. Sometimes the tweeters can be angled, but otherwise the tweeters are permanently attached. These come in all quality ranges from low- to high-end. Many stock systems use coaxials to provide decent mid- and high-frequencies from a single location, usually in the door or dash.
Components - This is the preferred arrangement of speakers, a woofer and tweeter in separate mountings. This allows you to "aim" the sound towards the listeners and provides the best acoustic sound. Most modern vehicles with premium systems utilize component systems, though they often mount the mid and tweeter too far away from each other, which creates a whole host of acoustic issues.
When it comes to Ford, the 6"x8" (a 5x7 fit, they use the same frame with slotted mounting holes) is king. Most Ford cars and trucks built from the mid-'80s through today utilize the 6"x8" speaker frame, particularly in the '90s. While the oval cones have a few inherent issues (potential for non-linear movement when pushed to the limits, which results in distortion), they are not hard to overcome. One of the most popular swaps in the SN-95 Mustang was to remove the 6"x8" in the front doors and build a plate to hold a 5-1/4" component set. Here is a list of Mustang-platform speaker locations and sizes.
1965-1973 - single 4"x10" in the center of the dash, with some rare optioned (with the factory AM eight-track head unit) cars having a 4"x8" in the lower front door
1964-1966 - front 4"x4"
1965-1968 - rear single 6"x9" in coupe
1967-1968 - single 5"x7" in dash
1974-1978
5-1/4" in the
6x9" in the rear deck
1979-1993
Depending on the trim package, most models used a pair of 3-1/2" speakers in the dash under a trim cover. In some models, there is a 5-1/4" speaker in the kickpanel, and other models had either a 5-1/4" or a 6-1/2" speaker in the door.
1994-2004
The standard speakers are 6"x8"s in the doors and 6"x8"s in the rear seat side panels. Premium systems often use plate-style components (a 4" or 5-1/4" with a tweeter) in the same 6"x8" location. The optional subwoofer would be mounted in the trunk.
2005-2010
There are a lot of options here, but the basics are as follows:
Front doors 6"x8", Premium SHAKER systems add an 8" in the lower portion of the door;
6"x8" in the rear seat side panels;
8" subwoofers in the trunk with the Shaker upgrade systems (as with most factory subs, these leave a lot to be desired).
Before you start replacing speakers and changing their locations, you need to understand what it is that you want. A broad, tall stage with defined imaging is the key to good sound quality audio system. Imagine the dash is a concert stage. Staging is the width, height and depth of the sound stage in the car. The music should sound like you are at a concert, not a jumbled mess coming from one distinct location. A wide, tall stage is the goal. Imaging defines the stereo's ability to reproduce locations for the individual instruments. You want to hear the vocals from the dead center (in most cases) and the other instruments should sound as if they are in one location on the dash, not moving around. Competition car audio systems often sound as if the music is coming from outside the car, on the hood, stretching wider than the car itself. This is a very simplified explanation, but it should get you started.
While many builders would be content to simply replace the factory speakers using the stock locations, there is much to be gained by changing the placement of the speakers. Replacing the speakers in stock locations is not difficult; it usually requires removing a few panels to access the mounting. You need to be careful when removing plastic panels, they are easily broken, and often are retained by hidden fasteners.
For the vintage cars that use a mono speaker in the dash, you don't have many options. You could chop a huge hole in the door, but that hurts the value of the car and your leg blocks most of the sound anyway. For most car and trucks, the kickpanels are the best location for speakers. Moving the speakers to the kickpanel area equalizes the distance between the listeners and the speakers. When one speaker is closer to your ear than the other, you hear the closest sound first. This becomes a problem for audio because the human ear perceives both sounds as coming from the first location, so everything sounds like it's coming from one side of the car. By equalizing the pathlengths between the two speakers, the left and right channels will arrive at the same time, giving you a proper stereo image.
You can build your own kickpanels, but Custom Autosound and Q-Logic offer aftermarket replacement kickpanels with locations for speakers right in the kickpanel. For the vintage cars (1965-1973), Custom Autosound has the ticket. These panels come with a coaxial 5-1/4" speaker. The speakers are better than stock, but there are definitely better speakers available. If you have a later model, 1979 or later, then Q-logic Q-Forms are the ticket. These panels provide placement for up to a 6-1/2" speaker and 2" tweeter in the kickpanel with proper imaging and staging for the best sound possible.
As for the speakers themselves, you must consider several things before making a purchase. Replacing the stock speakers while retaining the factory head unit is not going to improve the sound as much as you might think, you are still powering the speaker with very little power. For those with premium systems, the factory system provides more wattage, so aftermarket speakers will make a bigger difference, but if you have a basic stock head unit, you would be better off replacing the speakers and the head unit. The speakers need to match the supplied power output. For example, a 1994 Mustang with an aftermarket head unit producing 20 watts per channel should be coupled with speakers that are rated at no more 50 watts each. These speakers will play louder at 20 watts than speakers that are rated at 100 watts. If we add an amplifier to the system, say 100 watts per channel, then the speakers should be rated at 75-100 watts each. You can select speakers that are rated for higher wattage, but you will not be gaining anything, they won't necessarily play louder (they will actually waste more power) or sound better. On the other side of the coin, you don't want to select speakers rated for 150 watts and push 300 watts of power through them. This will generate too much heat and overdrive the speakers, eventually causing them to burn up.
There are other considerations with speakers other than wattage ratings. The construction of the speakers is very important. Here is a quick breakdown.
Basket - This is the foundation of the speaker. Common basket materials are stamped steel, cast aluminum and plastic. Stamped steel is cheap and sturdy, which is why most stock speakers use stamped steel through the '90s. Stamped steel also flexes. If you drop a stamped steel speaker, it will probably bend, and will cause the moving parts to rub and eventually burn up. Cast baskets are more expensive and heavy, which is not necessarily a bad thing. A solid base means no flex, and less potential for vibrations in the basket itself. This also means lower harmonic resonance, so the speaker itself has less tendency to buzz. The middle ground is the cast or injected plastic basket. It is lighter that cast aluminum, but stiffer than stamped steel (in terms of flex). Most high-end speakers use cast aluminum or injected plastic baskets, the bigger the motor structure (magnets and voice coil), the more important the basket strength. A plastic basket for a mid-driver is just fine, but for a large diameter subwoofer, cast aluminum is best.
Magnets - When it comes to speakers, size matters. For mids and highs, the depth of the speaker is critical for fitment. If you are installing a door speaker, clearing the window is always a potential problem. One of the marketing tools used by speaker manufacturers is "bigger is better," but that is not always true. High-fidelity mids and highs do not need huge magnets, just powerful ones. An iron-ferrite magnet is the most common for speakers. They are cheap and powerful, but they are also fairly large. If space is not a concern, then it's not a problem. For door and dash speakers (rear sail-panel speakers as well), depth is an issue and you should consider a speaker with a neodymium magnet. These magnets are extremely powerful and very small. Most tweeters use neodymium (sometimes referred to as "Neo") because of this. Neodymium is more expensive than iron magnets, so expect to pay a little more. Most subwoofers require large, powerful magnets to control the larger cones, therefore most subwoofers use iron-ferrite magnets. Some high-end subs use neodymium, but these are more expensive and give up some bottom-end thump for smoother response and clarity, geared towards the audiophile.
Cone - The most common cone materials are paper, plastic, aluminum and Kevlar. Stay away from paper cones, especially for door and dash speakers. Even though they are "reinforced and coated," once they get wet, they fall apart; sunlight kills paper cones too, so dash and rear-deck speakers should NEVER use paper cones. Do not be surprised to pull your old factory speakers to find no cone. Most factory speakers use paper cones. They are cheap, easily produced and lightweight. There are a few high-end speakers that use paper cones, but they are combined with other materials for strength and durability, factory cones are not. An injected plastic cone is the most commonly used for aftermarket speakers. The lightweight, inexpensive nature lends itself well to quality sound reproduction.
Another quick note-the surround, the part that supports the cone to the basket, should be made of rubber or rubberized foam. Cloth surrounds are great for high-end home audio speakers where the elements are not an issue, but moisture and UV light can kill a cloth surround faster than it does a paper cone.
Terminals - the less expensive a speaker, the cheaper the wiring terminals are. Look for a speaker with screw-type push-pin wiring terminals. Cheap cardboard tabs used to hold the wiring terminals break really easily, so keep that in mind.
Adding bottom end to your Mustang or Ford is a fairly simple process. From the basic pre-built enclosures and custom-fit specialty boxes to full-on custom builds, there are endless possibilities. For this guide, we are sticking with the pre-built boxes and specialty custom-fit enclosures. How much bass you want determines how much space you want to give up. Some Mustangs are easy, some are really tough. For a quick primer on subwoofer enclosures-there are three main types of enclosure-sealed, ported and bandpass
Sealed - This is a fully-enclosed box, no venting or passive radiators. Sealed enclosures offer tight bass with highest power handling characteristics of all three styles. They are not tunable, but provide excellent sound quality.
Ported - Ported boxes provide more output than a sealed box at the expense of power handling and sound quality. That does not mean a ported box does not sound good, but they provide less control over the subwoofer than a sealed enclosure. Ported boxes are tunable, which means you can tune the box to the subwoofer and vehicle, within reason.
Bandpass - The bane of the big boom era. These boxes combine a small sealed section and a ported section, to provide a loud booming system. The problem is that these enclosures are one-note wonders, they play a very narrow range of frequencies and just don't sound good at all. They are good for small spaces though, where you just can't fit much else, like a Fox-body convertible.
1965-1973
The early Mustang presents somewhat of a challenge for subwoofers. Specialty enclosures do not currently exist, so you have to use either a pre-fab box or build something. The problem here is that there is not much height available in the trunk where the floor is flat. Keeping the subwoofer small will allow you to save as much trunk space as possible. A pair of 10-inch subwoofers in a small sealed (.65 cubic foot per woofer) enclosure will provide you with a good amount of tight, controlled bass. Moving up to a 12" subwoofer would preclude the enclosure from sitting under the rear deck (over the rear-axle hump), taking up a lot of extra trunk space. Fastbacks and convertibles offer even more difficulty, a small ported 10" subwoofer would also sound great and fit in either side of the trunk (or under the rear deck in a coupe), 8" subwoofers are small enough to fit, but will likely leave you wanting more, unless you run three or more. Stick with 10" subs or multiple 8" subs.
1974-1978
The Mustang II had a more open trunk area, which lends itself well to subwoofer installation. If space is not a problem, a pair of 12" subwoofers in a ported enclosure will send your eardrums into shock firing against the back glass of the hatch. For moderation sake, a pair of 10" subs in a ported enclosure tuned to 32 hz is about perfect.
1979-1993
The Fox-body Mustang came about during the car audio boom, and there were many 5.0s on the Sound Quality competition circuit, particularly hatchbacks. The coupe and convertible had very small trunks, and there is not much you can do with them, other than a custom installation. A single ported 10" subwoofer for the coupe and either a small bandpass 8" subwoofer or a custom install for the convertible.
1994-2004
There is a ton of room in the SN-95 body. If big bass is your thing, you can easily fit a dual 12" ported enclosure in the trunk of a coupe. For the space-conscious, JL Audio offers a Stealthbox specialty enclosure with a single 10" subwoofer that mounts to the passenger side trunk wall behind the tire well.
2005-up
The factory subwoofer systems for the S197 Mustang are anemic at best. You would be much better off saving your money at the dealership and going for an aftermarket version like Kicker, Saleen, Shelby, JL Audio or any number of other manufacturers offer. Most of these units mount in the same location as the stock unit, but offer bigger subs. The Q-Logic version is just an enclosure, this allows you to select any 12" sub that works in a 1 cubic-foot enclosure. You can always go big, with a ported dual 10" or 12" enclosure as well, there is plenty of room in the coupe. For the convertible, stick with the aftermarket specialty-fit enclosures and save some trunk space.
In order for the subwoofer (and speakers) to play, you need an amplifier. Since amplifiers are universal, we will just touch on a few basic selection points. Though the head unit has a small amp, mids and highs will always sound better with an outboard amplifier. Amps for mids and highs should be of the Class A (very inefficient, mainly for serious audiophiles) or AB variety, not Class D or "Digital." Class D amps have more switching noise, which can come through mids and highs. Each amplifier channel should provide slightly more power than the speaker it is driving. This is called "head room" and it allows the amp to run cooler and provide the speaker with the amount of power it needs to play at full volume without distortion. Don't cheap out on your amps either. Cheap amps will only make your system sound cheap, you can hear quality, in every component. Research all of the products you are considering and when possible, audition them in a sound room or friend's car. Don't just take the Internet's word for it. Adding amps also means an additional drain on the alternator and battery. If your lights are dimming, that means the alternator can't keep up with the demands of the system. Upgrade to a higher-output alternator if you can, otherwise a carbon capacitor may be in order. As always, when in doubt, seek a professional's opinion, it is well worth the time.

Classic Fords like this '65 Mustang Coupe had shaft-mount radios. As time progressed, FM and cassette tapes were added. Eight-tracks were usually mounted under the dash or on the floor.

Like most shaft-mount radio cars, the dash or radio pod must be cut to fit a modern CD player. This 1968 Mustang radio pod was trimmed to fit a single DIN-size head unit. There are alternatives to cutting (which can lower the value of the car, especially on a metal dash), like installing the CD player in the glovebox, center console or using a CD-changer with a shaft-mount radio.

The 1987-and later Fox-body Mustangs use the Ford Keys, which slide into the two holes on either side of the radio. Dash kits are not required for the '87 and later Mustangs, but are required for the earlier shaft-mount Fox Mustangs.

For many Mustangs and Fords, installation accessories are required. The dash kit covers the exposed dash panel and provides the mounting tabs. The wiring kit plugs into the factory wire harness (the part that would have been plugged into the factory radio), and the loose wires are connected to the wire harness for the new head unit.

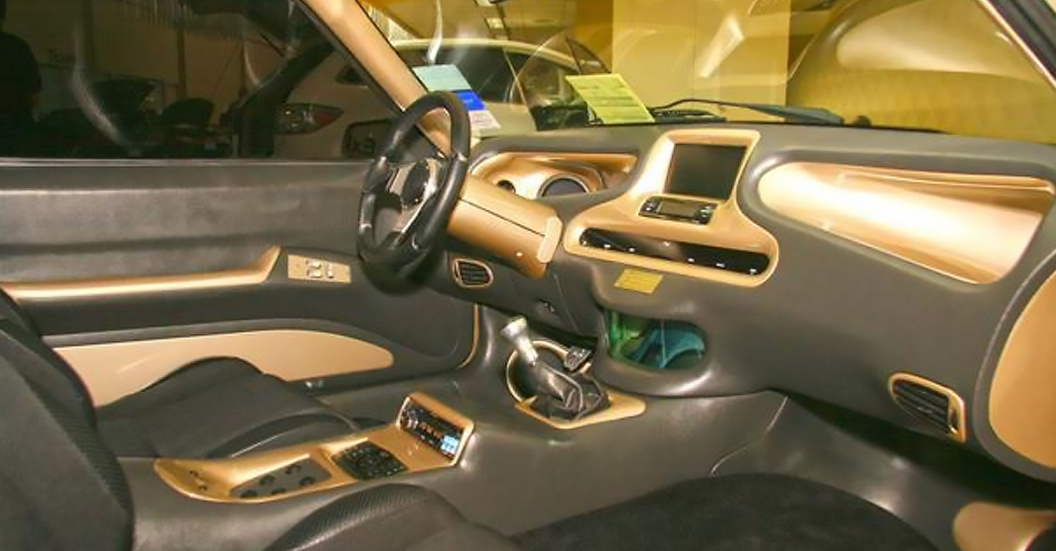
This 2005 Mustang GT originally had the Shaker 500 system. The stock head unit was replaced with a Pioneer double-DIN DVD system. The 2005-up Mustangs, along with most late-model Fords, use the double-DIN format, which makes adding a DVD head unit simple.

Factory locations in Mustangs are typically the doors and rear deck or side panels. The 2005-up Mustangs offer 6"x8"s in the doors and with the upgrade systems, 8" mid-woofers in the doors as well. The 8" can be swapped out for an aftermarket 8" subwoofer with a minor amount of fabrication work, and sounds incredible.

The best location for the speakers is actually in the side of the footwell. Aftermarket kickpanels, like these from Q-Logic, equalize the distance between speakers and your ears, it makes a big difference. Plus they look killer.

For older Mustangs, Custom Autosound offers these versions. The speakers are small coaxial, and they leave a little to be desired, but are better than a single 4x10 in the dash. You can swap in a better speaker, but you have to add a wood ring because the panel is too shallow to clear most speaker magnets.

The main difference between a coaxial speaker and a component is the separate tweeter. The coax tweeter is permanently mounted to the center of the mid driver. A component set allows you place the tweeter and woofer separately, which aids in tuning. Component sets also use passive crossovers, which filter out the unwanted frequencies from the speakers, allowing the speaker to play just the range it is designed for. The crossover is usually dressed up, like this Kicker unit, this way you can show it off as part of your install.

The backside of a speaker tells more about the quality. A cast basket adds rigidity and you can see all the different components for what they are, not just an advertisement. Flimsy materials that look cheap probably are, and it looks too flashy, it is probably trying to make up for something.

Adding a subwoofer to your Ford is fairly simple, especially if you are keeping it simple. This Q-Logic enclosure is a direct fit for the Ford Focus, adding a 10" subwoofer while retaining full use of the trunk.

A ported enclosure uses a port to effectively dampen the internal volume of the enclosure to match the frequency of music being played. This makes them louder than a sealed enclosure (by 3-6 dB), and very efficient. This enclosure uses the slot-port configuration which reduces the pop-bottle effect of port noise. Round port tubes can sometimes "whistle" as the air blows over the edge of the port tube, particularly at levels close to the tuning frequency.

Early Mustangs do not have much trunk space. In this '65 coupe, a pair of 10" oval subwoofers from Boston Acoustics was installed with a custom enclosure. The enclosure rests on the axle hump, taking up that space, leaving some available trunk room. It is a good idea to protect your subwoofers from potential damage with a grill.

For smaller trunks, like fastbacks and convertibles, powered subwoofers like the Overload from Rockford Fosgate are a good idea. This subwoofer comes with a built-in amplifier and is an easy installation. Plenty of bass output, coupled with an easy install in a compact package makes these a no-brainer.

For the 2005-up crowd, there are plenty of direct-fit enclosures. Most make use of the factory brackets in the stock Shaker 1000 subwoofer system, and provide more output like this one from Q-Logic.

You need an amp for subs (and it's better for your mids and highs too), but the power ratings should match the speakers. When possible, stay about 20 percent above the speaker power handling, this will keep you in the safety zone and keep your amps running cool and clean.
Sources
Boston Acoustics
(978) 538-5000
http://www.bostonacoustics.com
Crutchfield
(888) 955-6000
http://www.crutchfield.com
Custom Autosound
(800) 888-8637
http://www.casmfg.com
JL Audio
(954) 443-1100
http://www.jlaudio.com
Kicker
(800) 256-3746
http://www.kicker.com
Pioneer
http://www.pioneerelectronics.com
Q-Logic
(800) 762-0351
http://www.qlogicenclosures.com
Rockford Fosgate
(480) 967-3565
http://www.rockfordfosgate.com
Source: Medford, Brian. "Mustang Electronics Buyer's Guide."AutoTraderClassics.com. N.p., n.d. Web. 10 Feb. 2015.